Using Salesforce Process Builder’s Scheduled Actions
Using Salesforce Process Builder’s Scheduled Actions
Jeremy Isett | Software Architect
February 5, 2021
Salesforce’s cloud based CRM features many advanced tools that are accessible to administrators. Process Builder is one of these tools and allows an admin to build business rules that react to the creation and editing of records. A really useful feature of Process Builder is the ability for it to execute business rules in the future. These future actions are called Scheduled Actions. While Scheduled Actions may not be ideal for complex scheduling needs, they offer a simplified and accessible way to automate business rules. Following the tips I’ve outlined below can help you have a smooth and productive experience with Scheduled Actions.
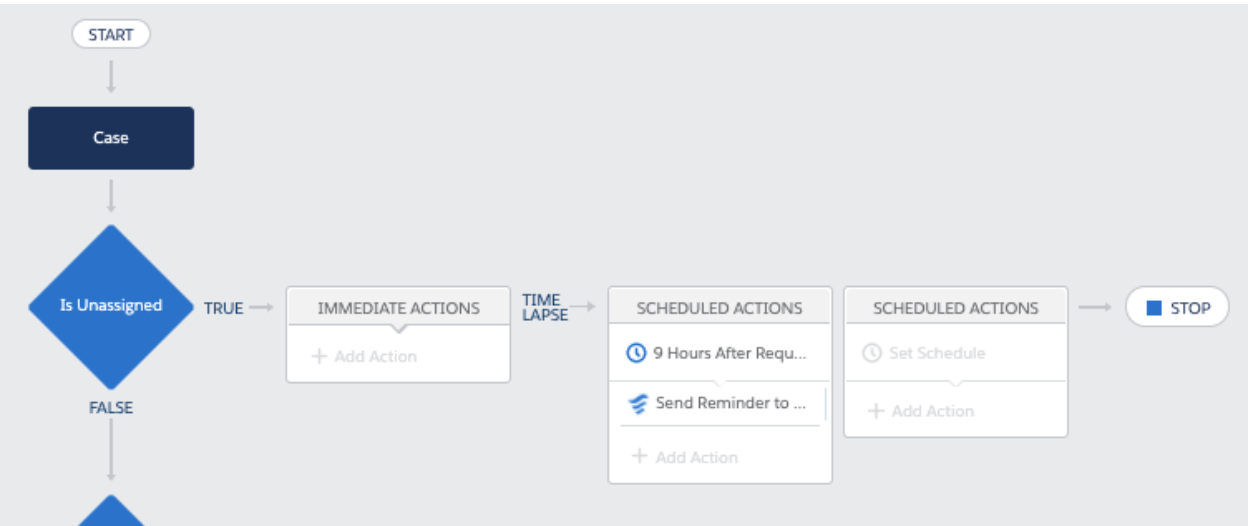
While in a process in Process Builder you should see the area to add ‘Scheduled Actions’ (see the image below). From there it can be quite easy to add a process to occur at some future time. I’m not going to get into all the details of creating a Scheduled Action. If you’re just starting out with Scheduled Actions I suggest completing Automate Simple Business Processes with Process Builder tutorial in The Lightning Flow module.
Now, before you go to town creating an army of future business processes, I’d like to share some tips with you so you get the most out of this tool. These tips are geared towards creating flexible Scheduled Actions that require the fewest changes and little maintenance.
Build a New Process
You may already have existing processes built for your objects. For setting up a Scheduled Action it is important you don’t include them in those processes. One of the main reasons for this is the Scheduled Action itself will prevent the next criteria row from being evaluated until after it executes. Also, as I will discuss later, when updating a process it has implications on the currently queued Scheduled Actions. So you really want these Scheduled Actions to be isolated from other processes.
Use a Formula Date/Time Field to Control Execution Timing
When creating your Scheduled Action you’ll need a way to determine the date and time to execute your action. Instead of reacting directly to an existing date field on your object it can help to rely on a Formula field that creates the date and time.
For example, if I want to send a reminder email out two days after a record is created I would create a Formula field that creates a date and time from the standard Created Date field. I can then use a formula that skips the weekends, or considers some other important date logic. Example code for that sort of Formula field is below:
CASE(
MOD(CreatedDate - DATE(1900, 1, 7), 7),
0, CreatedDate__c + 3, /*Sun to Wed */
1, CreatedDate + 2, /*Mon to Wed */
2, CreatedDate + 2, /*Tue to Thu */
3, CreatedDate + 2, /*Wed to Fri */
4, CreatedDate + 4, /*Thu to Mon */
5, CreatedDate + 4, /*Fri to Tue */
6, CreatedDate + 4, /*Sat to Wed */
CreatedDate
)
Also, by using a date/time field you don’t need to rely on the Scheduled Action to determine the time. You can set the Scheduled Action to occur zero hours after the Formula field date. Then your formula controls the timing. You could use a Date Formula field (without time) but then the time of the execution would be at the start of the day (12 AM), or you have to include a time value in the scheduled action.
Keep in mind to be used in a Scheduled Actions your formula can’t contain date functions like TODAY or NOW.
Don’t Call Actions Directly
When setting up your processes it can be tempting to keep everything in the process and call actions, like an existing Flow, directly from the process. However, this approach can limit your flexibility and require you to update your process much more frequently.
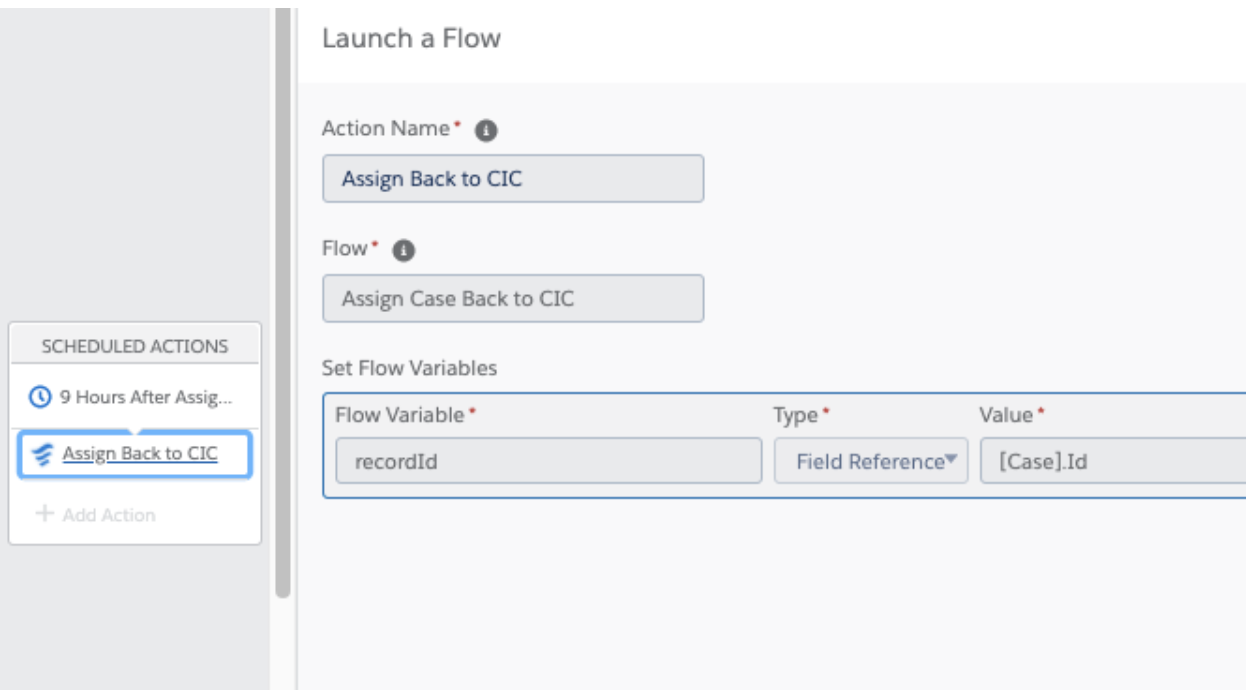
I highly recommend creating a new Flow, specifically for the Scheduled Action you’re creating that would then call the Flow (or Apex Action) that completes the business rule. For example, if I have a Flow that sends an email I would not call that Flow directly from the Scheduled Action. I would create another Flow that calls my email sending Flow. This gives me the flexibility to add additional logic and business processes to that new Flow. Also, I can make changes to that Flow without needing to update the process. In the image below there is an example of how this might look.
Limit Criteria in the Process
As you know a process uses criteria to control a row’s execution. This criteria is critically important when building a Scheduled Action as it determines if that action will be scheduled at all. If we put all the criteria into the process we run the very good chance that we will have to update the process frequently as that criteria changes. I suggest putting only a limited set of criteria in the process itself, just a few fields that you are sure will always be considered in the process.
Now, you might wonder how to maintain control over whether the process fires or not. Well, if you’ve followed the previous tip to use a Flow then that is where to include the full set of criteria. In the Flow you’ll have a lot of flexibility to examine and compare values before executing the final business process.
Scheduled Action Cleanup
If you notice a lot of the tips above are geared towards not updating the Scheduled Action very often. The reason for this is because when you do have to push an update for a process it requires a new version of that process be created. When the new version is created the previously created Scheduled Actions will remain in the system, and will not consider the criteria when they execute. This can be an unwelcome surprise for admins.
Clearing out the existing Scheduled Actions may require an admin to manually go through the Paused Flow Interviews in Setup. This can be time consuming and you may lose out on important actions entirely. By following the tips above you'll limit the changes to your processes and can rely on the criteria in the Flow to determine execution.
Following these tips can ensure you have a great experience working with Scheduled Actions.
I hope you enjoyed reading the Phase2 blog! Please subscribe below for regular updates and industry insights.